Thursday, November 25, 2010

Marble cake - bday edition :)

Marble cake is one of the classics and a favourite for all :) I find that all the ingredients are usually in the pantry which makes it a simple cake to make without going to the supermarket to buy any special ingredients~

Ingredients
170g butter
140g caster sugar
3 eggs
140g self-raising flour
1 tsp vanilla extract
2 tbsp unsweetened cocoa powder

1. Preheat the overn to 180oC.
2. Beat butter and sugar until pale and creamy.
3. Beat in eggs one at a time.
4. Sift the flour over the top then fold in.
5. Divide the mixture between two bowls. Stir vanilla extract into one, sift cocoa over the other and fold in.
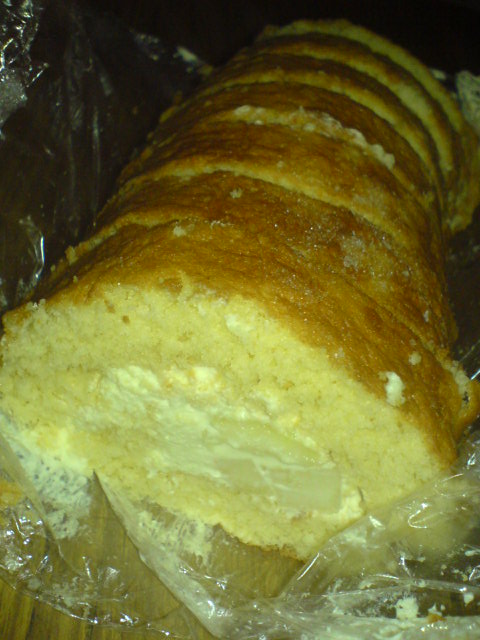
6. PLace alternating spoonfuls of the two batters in the cake tin. Drag a skewer through the dollops three or four times to give a marbled effect (hence.. marble cake :P)
7. Bake for about 45 mintues or until risen and golden (really depends on how hot your oven is)
8. Transfer to wire rack and leave to cool completely.

IF you would like to add some icing here is the recipe:

Icing
80g butter
150g icing sugar, sifted
1 tbsp unsweetened cocoa powder sifeted
1-2 tbsp milk
chocolate chips to decorate

1. Beat together the butter, sugar and cocoa and 1 tablespoon of milk until smooth and creamy. If neccessary, add a little more milk.
2. Spread icing over cake.
3. Sprinkly chocolate chips on top to decorate.

I made this as a thank-you cake for lab :)
Perfect cake for all occasions!!! even birthdays! haha.. speaking of bdays..


*Happy bday Manda and Law :)*

Tuesday, November 23, 2010

Pear Swissroll

I had some leftover cream and decided to use it in a filling for Pear Swissroll! Also inspired by Julie's swissrolls ^^v

Very very simple!!! now you don't need to buy it from asian cake shops xP

Ingredients for sponge:
90 g (3/4 cup) self-raising flour
3 eggs
115 g (1/2 cup) caster sugar

Filling:
250ml cream
1 tbs icing sugar
1 pear

Method:
1. Preheat oven to 190oC. Line baking tin with baking paper.
2. Sift flour 3 times (for air ^^)
3. Beat eggs in a bowl using electric beater (~5 min or until thick and pale). Add suagr gradually, beating until mixture is pale.
4. Using a metal spoon, fold in the flour quickly. Spread into tin and smooth the surface.
5. Bake for 10-12 minutes or until golden and springy to touch.


6. Place tea towel on kitchen bench. Cover with baking paper and spinkle with some caster sugar. Turn the cake out onto the baking paper.
7. Roll the cake up from the short side, rolling the paper inside the roll. Put the rolled cake on a wire rack for 5 minutes, then unroll and allow the cake to cool.
8. Beat the cream and icing sugar until stiff peaks form. Cut the pear into small cubes and add with the cream. Spread over cake.


9. Roll cake up again. Refrigerate for 30 minutes then its ready to serve!


Really does taste like asian cake shop!!! You can put different fillings.. e.g. jam.. mango.. chocolate.. the list is endless! so go on and be creative =)

Friday, November 19, 2010

Savoury Crossiants

I baked these for our last lab meeting last week.. its also in one of my photos (baked them when Terie was here ^^) and so here's the recipe =) very very very easy to make!!!

You will need:
DOUGH
2 cups plain flour
30gm butter
1 sachet yeast (15 gm)
180ml warm water
1/2 tsp salt
1/2 tsp sugar
FILLING
1 rash bacon, diced
30gm grated cheese (i use mozarella but tasty cheese should be ok.. and you can use more cheese if you want it to be more cheesy ^^)
1/2 cup chopped chives
pepper
GLAZE
1 egg beaten (can add a bit of milk)
1 Tb sesame seeds

1. Set oven at 200oC
2. Rub butter into sifted flour using fingertips
3. Dissolve yeast in warm water and stir in salt and sugar (you can leave for around 5-10 min if you want)
4. Pour yeast mixture into flour mixture and stir till combined. Knead dough on a lightly floured surface until smooth. Rest for 20 min for the dough to rise (only if you wish to.. but i think it makes it much more nice and "fluffier")
5. Roll dough out to a circle (~25 cm in diameter). Cut the circle into 8 triangles ( i usually do more to get the most out of it :P)
6. Combine bacon, cheese, chives and pepper.
7. Sprinkle filling on triangle and roll up from the long end. Twist ends together and curve into crescent shapes.
8. Arrange on baking tray (HAHHA THATS ME! =p JKJK.. lammeee HAHHA) and brush with beaten egg and sprinkle sesame seeds.
9. Bake for 7-8 min or until golden brown


 The crossiants i made this time.. not as golden brown and i wanted them to be... and i also forgot to rest the dough..

The crossiants we made last time when Terie was here.. looked much better!coz we rested the dough =p so the moral of the story is.. REST THE DOUGH ^^

Tuesday, November 16, 2010

Mini cheesecakes

Made some mini cheesecakes for Mel's bday today. Thanks to Terie for the recipe (who I think got it from Margaret? so thanks ^^)
Here is a step-by-step guide for you because it's so EASY!!!

Step 1 - Preheat oven to 180oC and line 10-12 holes of a muffin pan.

Step 2- Finely crush 150g Nice biscuits and mix with 70g melted butter. Firmly pack biscuit mixture evenly among cases.
   
If you don't have a food processor (which i don't) you can crush the bisuits in a bag with a rolling pin =)

Step 3 - Beat 250g cream cheese and 75g caster sugar together till smooth and creamy. Add egg and beat until combined. Add lemon juice and cream and beat until well combined. Divide mixture evenly among cases.

All the ingredients you need for the filling


Step 4- Bake for 20 minutes. Allow to cool in pan for 30 minutes. Refrigerate and serve cold =)

I haven't actually tasted them yet but hopefully they are ok^^


~happy birthday Mel~

Monday, November 15, 2010

Mango Pudding

First time to try and make mango pudding and it was a lot EASIER than I thought. Decided to make it because we had heaps of mangoes~

For my mango pudding i just used Mango, condensed milk, gelatin and water.

I added 4 tsp powdered gelatin to 2 cups of boiling water. Then I added around 1/2 tin of condensed milk and mashed up mangoes (with a few chunky bits) and poured into cups and refrigerated for a couple of hours. It didn't exactly taste like the real ones but good enough =)


Tuesday, November 9, 2010

Mum's banana and walnut muffins

My mum doesn't seem to need a recipe when she makes muffins. She just adds the ingredients and pops them into the oven and they are a success (most of the time =p). I guess she does have a basic recipe and then adds whatever ingredients/flavours she likes. This time since we had some really ripe bananas we decided to make banana and walnut muffins.

Ingredients
2 cups Self-raising flour
1 cup brown sugar
1 tub yoghurt (~150 g)
3 ripe bananas
Handful of walnuts
Handful of sultanas
1/2 tsp cinnamon
1 egg beaten
splash of milk

As you can see some of the measurements are really rough xD but basically you just mix it all up in a bowl and bake at 180oC for 10-12 minutes or till golden brown :)
A quick and versitile snack =)

its my camera that makes it look a lil yellow ><

Wednesday, November 3, 2010

Comfort food - Apple pie

I've been having cravings for apple pie recently... not sure why =S haha.. so I was looking up some recipes on the internet for pie crusts. I wanted to make some nice pastry =) 
Here's the recipe I used for the pastry:


Ingredients
1 cup Plain flour
1/2 cup Self-raising flour
1/2 cup corn flour
125 g butter, chilled, chopped
1/3 cup caster sugar
1 egg separated


Method
1. Sift flours and sugar into a bowl.
2. Rub butter into dry mixture till it resembles bread crumbs (or if you have a food processor which i dont == you can just process it all in there! much easier and less messy ^^)
3. Add the egg yolk and 1/4 cold water and mix to combine. Knead gently until smooth. Wrap in plastic and refrigerate till firm (~30min - 1 hour)
4. Roll our pastry and line greased pie tin.


This is the cutest lil egg separator i've seen ^^ thanks MEI!!! <3
Just to let you know when I made this pastry.. it was really soft.. i might have added too much water.. so adjust the water to your needs.. i added more flour because it was too sticky. Maybe when i make it again i'll use a different pastry recipe.. but it turned out ok :) nice and crispy edges.. kinda tastes like biscuit! haha.. i baked it for ~10 minutes then added the filling and baked it for another 30 minutes at 180oC.


Filling
2 apples peeled, sliced
1 tbsp brown sugar
1/2 tsp cinnamon
1 tbsp plain flour
pinch of salt


so the finished product:
The crust looks a little messy... but tastes great =p my craving is satisfied =) Tastes best when served warm with a scoop of vanilla ice-cream!

ENJOY :)